Feeds:
Posts
Comments

Archive for June, 2010

Poppies

Glass vase of red poppies on white table with lamp in yellow room


Poppies

Originally uploaded by PioneerValleyGirl

A new job and a trip to Vermont got in the way of blogging lately. I promise, lots of quilting pictures from the Vermont Quilt Show, coming soon.

For now, though, some pretty flowers (yes, I’m buying you off)

I do love poppies. These lovelies are from my CSA. Flowers with my weekly share are such a nice touch.

Read Full Post »

Weekend Project

My weekend project a couple of weekends ago:

A piece of scrap wood and  –inspired by this project — those thread spools that accumulate so quickly.

Now it holds the constant accumulation of canvas grocery bags by my back door

Read Full Post »

This pillow is a variation on the block I used for my wall quilt

Red White Moder Cottage Style Patchwork Quilted Pillow Sham

(It’s available in my shop)

In red, the block reminds me a bit of a gift bow/ribbon… Or is that just me?


Red and white modern cottage style patchwork cushion cover

Gratuitous pillow photos...

Read Full Post »

I do love the versatility of half-square triangles…

Light Blue and White cottage quilted pillow

Same colors, same blocks, three different arrangements.

Aqua and white handmade modern half square triangle lapquilt

(These aqua items are all in my shop)

Turquoise and White Beach-y Modern Quilted Pillow Sham

And look at the pretty colors I get to work with next:

pink and orange fabric

I’m making a custom HST quilt for someone and she picked these beautiful, warm colors.

Read Full Post »

Redecorating…

A week of ridiculously hot weather (way too hot for a quilt) and an urge to re-decorate something (whether or not it needed it) set me to making a light summer coverlet for my room.

It’s just a simple nine-patch pattern with a apple green fabric from my stash – it’s not quilted (no batting) just backed with cotton.

Yellow and green cottage style bedroom

And, while I was at it, a mini quilt for the wall. (This is the first time I’ve done it, but I really like this block)

And, new pillow cases with some of the left over fabric. I used the measurements from Ashley at Film in the Fridge’s tutorial but used my serger, instead of doing french seams.

Here’s what it looked like with my regular quilt.

I love this quilt, it’s not gone, just staying at the foot of the bed until the cool fall weather.

I’m thinking about an accent pillow – just haven’t settled on a pattern yet. Anyone have an idea? Maybe a star of some sort?

Read Full Post »

I’ve had a few questions about my cathedral windows quilt….

Cathedral Windows Quilt - White, red, sage green

There are lots of tutorials online. I hunted for the one I used, and learned I have way too many bookmarks in my “quilting” folder.

Here are two:

Hyena in Petticoats has a nicely written tutorial  for a technique I ended up not using, where you just fold the edges in, instead of stitching.

This is the one I did use  – more or less. I used the “modern approach” where you machine stitch the backing blocks together (there’s already alot of handstitching in this quilt, without handstitching the backing blocks too)

I didn’t tack the corners down, I found it easier to do it by hand after I sewed the inserts, since I only joined a few blocks together at a time.

Size: I wanted jumbo blocks so I could actually get the quilt done. I used 6.5 inch squares for my inserts and started with 20.25 inch squares to start for the backgrounds. I used the Kona muslin, though if I were doing it again, I’d just use a solid that was slightly less tightly woven for 20 background blocks. I think I bought about 15 yards of fabric (yep, it takes alot of fabric – but remember, there’s no backing or batting to buy)

You can use the size chart in the tutorial for smaller blocks. For larger ones you have to do some math. The backing fabric is roughly 3 times the size of the inset square.  I set up a proportion (4/12.5 :: 6.5 / x ) using the dimensions from the chart and the size of my inset square to calculate mine.

Read Full Post »

Big blocks, small quilt.

These are the biggest cathedral windows ever – the inset squares started as 6 inch squares. The background ones were 18 or 20 before folding.

Cathedral Windows Quilt

A darn good excuse to sit on the couch and watch Glee episodes – the windows are handstitched.

Cathedral Windows quilt

I started this last summer when I needed a hand-stitching project to take on a trip, the colors are picked to go in my sewing room.

Read Full Post »

Someone asked for a tutorial for how I finish my placemats.

This is basically the birthing method – so it’s definitely not original, or new, but it does make a nice placemat.

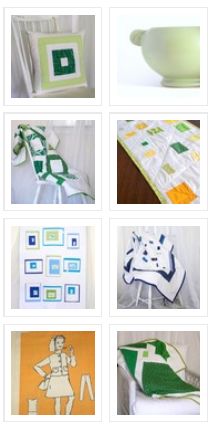
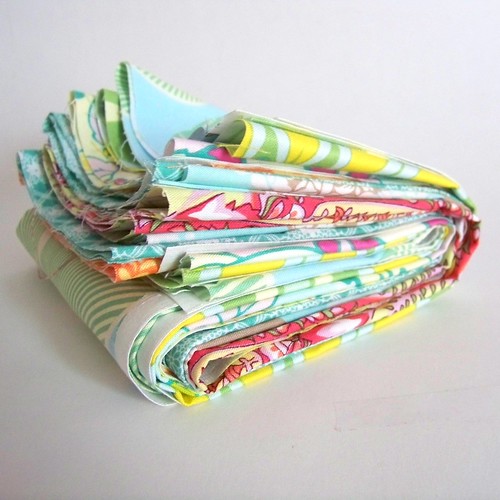
1) Make the fronts of your placemats – you can use a single solid fabric, or use patchwork or applique, whatever you like. It’s a great way to use up scraps or orphan blocks.I’ve used one of my favorite designs, a couple strips of patchwork on a white background.

The size is up to you – my sample here is on the small side at 11×14. Keep in mind that you’re going to lose a quarter inch seam allowance on each side.

Patchwork Placemat front

2) For each placemat, cut a backing and piece of batting the same size as your fronts.

Batting and Backing for Placemats

3) Assemble the quilt sandwich. But be careful, the order is a little different than most quilting. I’ve layered them out so you can see the order:

Front, right side up

Backing, wrong side up (so the right sides are together)

Batting.

You, of course, are going to layer them with the edges neatly lined up.

Pin carefully (I’m usually a lazy pinner, but you don’t want things to shift and twist here)

Order for assembling placemats

4) Stitch most of the way around, leaving a gap large enough for your hand to fit through easily. A walking foot helps – if you’re not using one, just be extra careful that things don’t shift.  Whatever foot you use, keep an even, quarter inch seam allowance.

You can use pins to mark your opening, like the picture, but I don’t usually bother. If I  have a choice, I do try to keep the opening away from patchwork seams, so I don’t put stress on them when I’m turning it.

stitching placemat

5) Trim the corners to reduce bulk. Cut the tip of each corner on a 45 degree angle leaving yourself about an 1/8th of an inch seam allowance to the corner.

Trim corners to reduce bulk

6) Turn your placemat. I don’t have a picture here, really, there’s no way to take a picture of this that doesn’t just look like a ball of fabric, and I’m sure you can figure it out. Poke the corners out – I like to use the blunt end of a bamboo skewer, but use whatever, just be careful.

7 ) Press  – paying careful attention to the seams. You want them to lie flat and for the backing and front to make a nice even like. I iron the opening too, I think it makes it easier to stitch it up.

Press turned placemat

8) Which brings me to: hand stitch the opening closed using a ladder stitch. If you don’t know the ladder stitch, here’s a video

9) Top stitch around the edge of your placemat. This helps keep the folded seam in place and gives you a nice edge.

Topstitch 1/4 inch from edge

10) Quilt using the technique of your choice – I used machine-quilted straight, random lines, but you could do free motion or handquilting just as easily.

Quilted placematQuilted detail

That’s it.  Enjoy your  new placemat! Or whatever else you like – I make alot of small projects (coasters, tablerunners etc.)  the same way

set of four quilted placemats - green and white

Read Full Post »

I [heart] my farm

I love my farm share – I tend to gush about community and kids running through veggie patches  and real, fresh, local food and…..

Well, I’ll try not to gush too much.

Moving on:  I picked up my first share of the season this week, and already I’m putting up some of it for the winter.

fresh local collard greens in white colander

I get a bigger share than I can keep up with myself, so I freeze and can the excess and have local produce throughout the year.  These collards are headed for the freezer and then into soup some snowy day. (Although, we’ve been in some nasty hot and humid weather pattern that makes snow hard to imagine)

There’s lots of useful information about preserving food out there, but greens are easy.  Remove the ribs, cut (you could do them whole, I guess, but have you looked at the size of a single collard leaf lately?), blanch, bag and freeze.

Read Full Post »

I had two (and a half) projects in the works: one quilt that just needs a binding, one on the design wall (and the scraps from that quilt half-pieced into a matching pillow)

So, what project to work on? A totally unrelated pillow, of course.

Quilted pillow - blue and green block with white border

But, I do like these Watercolors blocks.

Blue-green quilted pillow and lapquilt

This one’s in my etsy shop

And, I got the other quilt bound. Just, after I took a detour into pillow making.

Read Full Post »

Older Posts »