Feeds:
Posts
Comments

Archive for the ‘Other craftiness’ Category

Huh…

I’ve been sewing long enough that I don’t really think much about the actual mechanics of  line up the fabric – lower the pressure foot – back stitch etc. Until I look down and think “huh”

sewing hst quilt blocks

There’s something strange about discovering something that you yourself have been doing – like the fact that I never realized I line up my HST blocks on the opposite side of my presser foot from every other seam I sew.  Anyone else ever have these moments? Or is it just me?

Read Full Post »

Happy New Year! (I can still say ‘happy new year’ three post’s into 2011, right?)

Continuing my not-terribly-regular series of sifting through my long list of bookmarked tutorials, and passing them along to you.

In honor of new year’s resolutions to get organized…

… a tutorial to sew Simple Fabric boxes from One Crafty Mumma

…  a  weighted pincushion/organizer tutorial by Elizabeth Hartman/Oh Fransson via Sew Mama Sew:

… and, one that’s not sewing related, but I think I may need to implement this winter: Meal planning magnets (including printable PDF) by Amy from The Red Chair Blog via Tatertots and Jello

Read Full Post »

Continuing my effort to pass my list of “some day I’ll make that” tutorials off to all of you.


I use cloth napkins: they feel  so civilized, and green, and I haven’t had to buy paper ones in years. I have a more than sufficient supply, but that doesn’t stop me from accumulating designs for more, and for napkin rings to go around them.


Fringed napkins from Purl Bee

Embroidered napkins from Design*Sponge


Reversible Napkin Rings from Craft

Autumn napkin rings from Heather Bailey


Happy crafting – and eating!

Read Full Post »

Holiday cards

Now that we’re officially in the pre-Christmas season, I made more of my patchwork cards

handmade christmas cards red pachwork cards

These ones are all red and white patchwork – I like a card that’s festive, but versatile enough for all the different people and holidays I send them too.

And I made enough to put some on sale in my shop


modern handmade patchwork red and white cards

Read Full Post »

I’m thinking of a new project, and I’d like your input.

Some background: I have a file full of photos of gorgeous local produce, I’ve played around with quality print-on-demand photobooks , and while I use a planner every day, I tend to make my own.

This year, I’m thinking of having a photo-filled planner printed with my locavore (local food) photo series.  Then I started thinking, you know, this might be a nice gift, and then I started thinking. Hmm, maybe I could put a few in my etsy shop, too.

Here’s a mock up of what a basic 2 page spread could look like (although, I already think I may move the photo) For this layout the book would be approximately 8.5 inches tall, by 5.5 inches wide, with a week on each two-page spread. Photos to reflect the harvest of that time of year (at least, here in New England)  so asparagus in the spring, apples in the fall etc. Probably some pages with larger photos and month or year at a glance calendars. Maybe a harvest calendar and resources for local food movements in the back,  just ’cause I can. Photos and design by me, printed at a local, independent, worker-owned shop with a soft cover  and coil binding (a heavy duty plastic version of the wire spiral binding you had on school note-books) so it lays flat.

handmade weekly planner/calendar with photo series of local food

MockUp of one week's page

I have a tendency to get excited about a new project and run headlong into it, but before I go and design and print a bunch of books, I’d like some feedback (really, honest suggestions and opinions appreciated).

If you use a planner/agenda/datebook, is it this sort of planner, that’s prioritizing design/appearance/photos, or the  ones that are super-functional with a block for every hour and a plain cover? how do you like it formatted? what size do you prefer? what extras do you like (year at a glance? month at a glance? pages for ____?) What would you change about the mock-up? Vegetables – am I the only one that wants to look at these?  And, about how much would you pay for a planner like that?

Any and all answers appreciated. Leave a comment here, or send me an email if you prefer at pioneervalleygirl [at] gmail [doc] com.

I’ll save the names of everyone who responds by 10/31/10 (you don’t have to answer all those questions – just give me your opinion) and will pull one name and send you a copy of the final product.

Read Full Post »

Kitchen Spoons

I live on the top floor of a big old Victorian-era house. Sadly, it doesn’t have the gingerbread, turrets and wrap around porches  that would immediately bring to mind it’s origins. What it does have, at least, my part of it, is odd little nooks and unexpected layouts, which I find charming.

This is one of my favorite of them, an odd corner of my kitchen just the right size for a pretty little got-it-from-a-yardsale-and-painted-white table and chair. I have a dining area with a full size table and enough chairs for guests, but this is my spot to sit and drink my first cup of coffee in the morning.

But anyways, what I thought I’d show you is one of my favorite, unexpected decorations: spoons.

The same blend of utility, beauty and crastsmanship that I love about quilts, I love in alot of vintage items (um, see shelf with antique bottles, my pyrex mixing bowls, my favorite blue and white teacups and the extra pieces of my petalwear dish set). Around here, you can get silver and silver-plate spoons for a dollar or so a piece at flea markets.  A couple of these have marks that date them to a 100+ years ago (for a dollar!)

Anyways, a few dollars, a few spoons with pretty decorations and an “A” monogram for my first name,  and an easy craft project, and I have a display. The dark blue backings are just painted pieces of styrofoam (it occurred to me later I could have wrapped the foam in fabric), and the the spoons are held in place by straightpins like an old butterfly display or something. You could glue, but I wanted the option to take them down so I could polish them occasionally if they got too tarnished, or scrap it all together if I got bored.

Read Full Post »

A Gift for YoYo’s mama

Yoyo the puppy wasn’t the only one who got a handmade present this weekend. His human got a voile scarf.

handmade cotton voile scarf - valori wells nest fabric in orange

I’m a little late to the party, but I LOVE this cotton voile. I made myself one of these scarves a couple weeks ago, and it’s quickly become one of my favorite things. I was already a fan of Valori Wells’ Nest fabric, but the texture of the voile is just gorgeous.

This is also an amazingly easy project for the results – just a few straight seams.

handmade gift - orange cotton voile scarf

Read Full Post »

Yoyo’s Leash

Life has largely overshadowed crafting and blogging , lately. Nothing dramatic, just a busy, busy couple of weeks for me. I did, however, make time for a quick birthday gift for a friend: a patchwork leash for her adorable puppy.


I did manage to make something for the human-half of the duo, too, but haven’t had a chance to take pictures yet.

handmade cotton patchwork dog leash

I just sort of made it up as I went along – a solid strip of fabric on one side, patchwork on the other – but Anna Maria Horner has a tutorial here.

It’s pretty simple construction – but I definitely recommend a heavy duty needle and a walking foot, if like me, you end up using nylon strapping (It’s sturdy, but also thick, slippery and hard to pin)

orange patchwork handmade dog leash

Read Full Post »

Flower Pincushion

A cute little project:

Flower is based on this tutorial, stuffed firmly, but I also added the button and felt leaf. I use a wrist pincushion mostly, I’m thinking a little pincushion flower corsage is next.

Read Full Post »

Patchwork Cards tutorial

A tutorial for the patchwork cards I sent to my DQS partner

I made two sets of these, and the pictures are a mix, I hope the changing colors aren’t confusing.

1) Pick a foundation:  I’m using a 5×7 piece of paper.

Usually for paper piecing, you’re planning to tear this off, so I look for really lightweight paper (I put the phonebooks that show up on my doorstep to use). However, I’m leaving the foundation on for these cards, for a bit more stability,  so tearability is less important even detrimental. Instead, think about acid-free materials. You can use whatever you like, but if you’re planning to save your card (or have their recipients save them) remember that paper like newspaper has lots of acid in it that makes it degrade, and that will eventually effect your fabric too.  All of the scrapbooking/papercrafting supplies at the craft store should be acid free.

About size – you can use whatever size you find pleasing.  I’m going to cut my square into quarters, ending up with 2.5 x 3.5 inch pieces. That’s the size of an ACEO, and just a pleasing proportion.

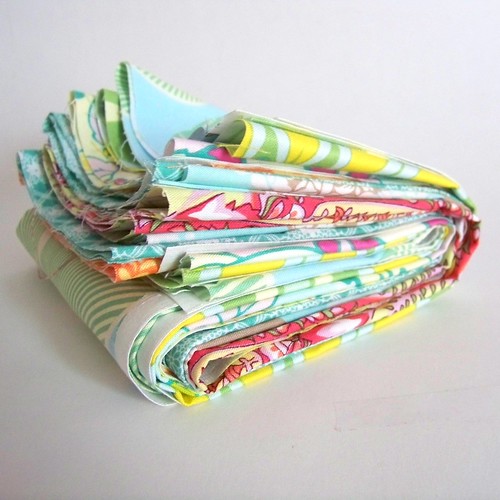
2) Decide on your pattern and fabric. You can use any paper piecing pattern you like, but I really like the look of a sort of improvised string-block. So I’m just gathering strips of different lengths and widths in coordinating colors/fabrics. Film in the Fridge has a nice tutorial for string blocks that you can use.

fabric scrap strips for patchwork cards tutorial

3) Foundation piecing.

First strip of patchwork cards tutorial yellow monaco fabric by dena designs

I use a fabric glue stick to secure my first piece of fabric (right side up) at a random angle across my paper foundation. Line another strip up along one edge, stitch, flip, finger press, repeat.

For this particular  card set, I added a strip on another angle across the top.

foundation piecing for patchwork cards tutorial

One important change from regular paper piecing: don’t reduce your stitch length. A smaller stitch perforates your foundation paper, the better to tear it off, but I’m not planning to do that.

4) When you’ve covered your whole foundation paper, use your rotary cutter to carefully trim away the piecing that hang over the edges.

back of foundation piecing for patchwork cards tutorial

trimmed patchwork block for cards tutorial

5) Cut your block – my 5×7 inch block is getting cut into four quarters, so I cut up the middle vertically, then horizontally. But again, do what you like – you could cut  bigger or smaller pieces. And while I like the efficiency and randomness of the piecing you get by doing it this way, you could skip this step altogether and just size your foundation the finished piece you want.
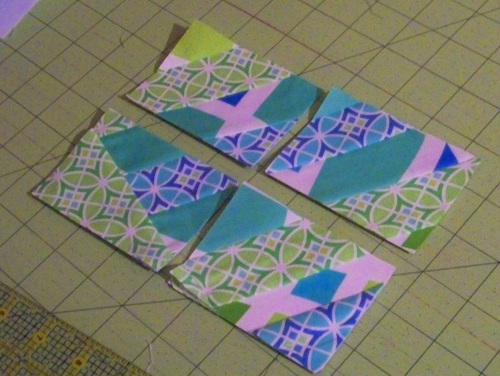
Cut patchwork into quarters for greeting cards tutorial

6) Place block on cards.

I use white 5×7 cardstock cards. I got a pack of 50  or 100 of these (with envelopes) ages ago at a craft store, but you could also fold your own from cardstock of your choice.  I like to position the fabric so that it’s centered horizontally, but is higher than centered vertically. Play around to see what looks right to you.

If you want to match mine, the top right corner is 1 1/4 inch down from the top edge, and 1 1/4 (the same distance) in from the right edge.

position patchwork ACEOs: greeting cards tutorial

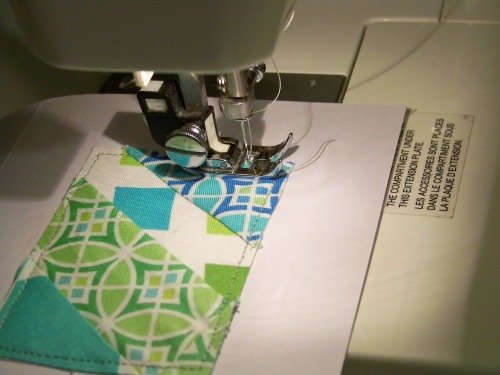
7) Stitch. To secure the fabric to the card base, we’re going to top stitch around the edge.  Pay attention to your fabric – you’ve probably got bias edges all over the place, even with the foundation still on for stability.
stitch patchwork ACEO: patchwork card tutorial

Both top and bobbin thread will be visible,  so think about how they’ll look. I’m using a soft gray, but you could either match it, or pick something contrasting to add interest.

No pins, they leave holes, you can use another swipe of glue-stick to hold it temporarily in place.

I stitch about 1/8 of an inch from the edge, all the way around, use a fairly long stitch (My machine goes from 0 to 4, I’m at about 3 to 3.5 for this) . Secure your ends with a small backstitch or two.

8) Done! Well, I’m done, you can keep going if you like.  I’m making blank cards. You can embellish further if you like — add a message on the front or inside, or decorate with rubber stamps, paper, pens/markers whatever makes you happy.  If you’re planning elaborate embellishments, you may want to do them before you stitch the fabric on.

finished aceo patchwork cards tutorial

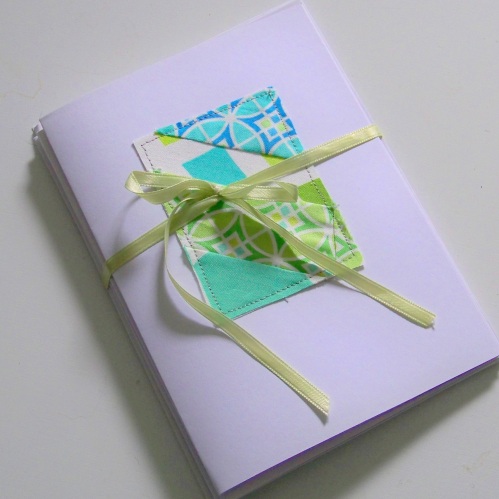
Tie a set with a piece of pretty ribbon, rick-rack or a strip of fabric for a gift, or stash them at your desk for a pretty note.

Finished set of patchwork cards - tutorial
** Tutorial is for your personal use, and creative inspriation only. Please do not use my design to produce cards for sale**

Read Full Post »

Older Posts »