Feeds:
Posts
Comments

Archive for the ‘Tutorial’ Category

I’ve wandered away from my plan of sharing the tutorials I bookmark and then have too many of to make. I’m trying to get back to that, with a few quilt-y ones:


Improvised patchwork tutorial from Completely Cauchy

Framed fussy-cut blocks from Kate Conklin Designs

Do. Good Stitches blocks from Texas Freckles


Previous attempts at sorting through my list of tutorials: Getting Organized, Napkins and Such, the original (read: random) post

Read Full Post »

Happy New Year! (I can still say ‘happy new year’ three post’s into 2011, right?)

Continuing my not-terribly-regular series of sifting through my long list of bookmarked tutorials, and passing them along to you.

In honor of new year’s resolutions to get organized…

… a tutorial to sew Simple Fabric boxes from One Crafty Mumma

…  a  weighted pincushion/organizer tutorial by Elizabeth Hartman/Oh Fransson via Sew Mama Sew:

… and, one that’s not sewing related, but I think I may need to implement this winter: Meal planning magnets (including printable PDF) by Amy from The Red Chair Blog via Tatertots and Jello

Read Full Post »

Continuing my effort to pass my list of “some day I’ll make that” tutorials off to all of you.


I use cloth napkins: they feel  so civilized, and green, and I haven’t had to buy paper ones in years. I have a more than sufficient supply, but that doesn’t stop me from accumulating designs for more, and for napkin rings to go around them.


Fringed napkins from Purl Bee

Embroidered napkins from Design*Sponge


Reversible Napkin Rings from Craft

Autumn napkin rings from Heather Bailey


Happy crafting – and eating!

Read Full Post »

The never ending list…

I don’t know about you, but I collect tutorials for projects I might do someday almost as fast as I collect fabric, which is to say, much faster than I can actually sew them.

Rather than leave them getting dusty in my bookmarks folder, I thought I’d start  digging them out and occasionally posting them here so you can put them on your to make list, and maybe one of us will actually get to them.  (Yes, my strategy formanaging my own excessive accumulation is to enable yours…)

So, some  sewing project tutorials-

Lots of Lunchbags

Legal Pad Cozy

Oak Leaf Bowls

modern quilting fabric - blue and gray

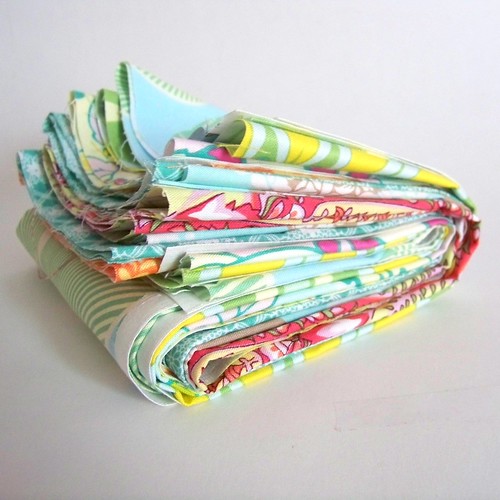
Random fabric pile, just 'cause


If you’ve got good tutorials languishing on your “someday I’ll make that list”, link to them in the comments, so I can add them to mine.

Read Full Post »

Patchwork Cards tutorial

A tutorial for the patchwork cards I sent to my DQS partner

I made two sets of these, and the pictures are a mix, I hope the changing colors aren’t confusing.

1) Pick a foundation:  I’m using a 5×7 piece of paper.

Usually for paper piecing, you’re planning to tear this off, so I look for really lightweight paper (I put the phonebooks that show up on my doorstep to use). However, I’m leaving the foundation on for these cards, for a bit more stability,  so tearability is less important even detrimental. Instead, think about acid-free materials. You can use whatever you like, but if you’re planning to save your card (or have their recipients save them) remember that paper like newspaper has lots of acid in it that makes it degrade, and that will eventually effect your fabric too.  All of the scrapbooking/papercrafting supplies at the craft store should be acid free.

About size – you can use whatever size you find pleasing.  I’m going to cut my square into quarters, ending up with 2.5 x 3.5 inch pieces. That’s the size of an ACEO, and just a pleasing proportion.

2) Decide on your pattern and fabric. You can use any paper piecing pattern you like, but I really like the look of a sort of improvised string-block. So I’m just gathering strips of different lengths and widths in coordinating colors/fabrics. Film in the Fridge has a nice tutorial for string blocks that you can use.
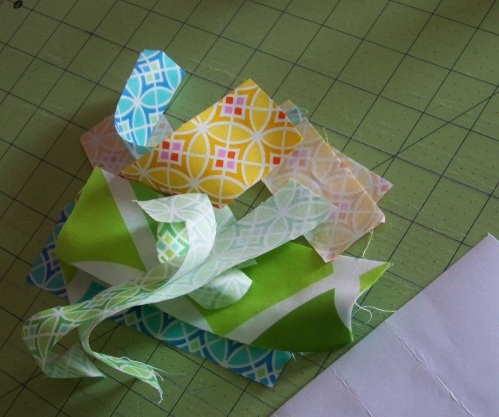
fabric scrap strips for patchwork cards tutorial

3) Foundation piecing.

First strip of patchwork cards tutorial yellow monaco fabric by dena designs

I use a fabric glue stick to secure my first piece of fabric (right side up) at a random angle across my paper foundation. Line another strip up along one edge, stitch, flip, finger press, repeat.

For this particular  card set, I added a strip on another angle across the top.

foundation piecing for patchwork cards tutorial

One important change from regular paper piecing: don’t reduce your stitch length. A smaller stitch perforates your foundation paper, the better to tear it off, but I’m not planning to do that.

4) When you’ve covered your whole foundation paper, use your rotary cutter to carefully trim away the piecing that hang over the edges.

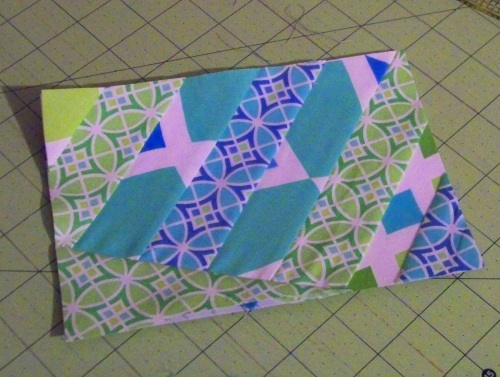
back of foundation piecing for patchwork cards tutorial

trimmed patchwork block for cards tutorial

5) Cut your block – my 5×7 inch block is getting cut into four quarters, so I cut up the middle vertically, then horizontally. But again, do what you like – you could cut  bigger or smaller pieces. And while I like the efficiency and randomness of the piecing you get by doing it this way, you could skip this step altogether and just size your foundation the finished piece you want.

Cut patchwork into quarters for greeting cards tutorial

6) Place block on cards.

I use white 5×7 cardstock cards. I got a pack of 50  or 100 of these (with envelopes) ages ago at a craft store, but you could also fold your own from cardstock of your choice.  I like to position the fabric so that it’s centered horizontally, but is higher than centered vertically. Play around to see what looks right to you.

If you want to match mine, the top right corner is 1 1/4 inch down from the top edge, and 1 1/4 (the same distance) in from the right edge.

position patchwork ACEOs: greeting cards tutorial

7) Stitch. To secure the fabric to the card base, we’re going to top stitch around the edge.  Pay attention to your fabric – you’ve probably got bias edges all over the place, even with the foundation still on for stability.

stitch patchwork ACEO: patchwork card tutorial

Both top and bobbin thread will be visible,  so think about how they’ll look. I’m using a soft gray, but you could either match it, or pick something contrasting to add interest.

No pins, they leave holes, you can use another swipe of glue-stick to hold it temporarily in place.

I stitch about 1/8 of an inch from the edge, all the way around, use a fairly long stitch (My machine goes from 0 to 4, I’m at about 3 to 3.5 for this) . Secure your ends with a small backstitch or two.

8) Done! Well, I’m done, you can keep going if you like.  I’m making blank cards. You can embellish further if you like — add a message on the front or inside, or decorate with rubber stamps, paper, pens/markers whatever makes you happy.  If you’re planning elaborate embellishments, you may want to do them before you stitch the fabric on.

finished aceo patchwork cards tutorial

Tie a set with a piece of pretty ribbon, rick-rack or a strip of fabric for a gift, or stash them at your desk for a pretty note.

Finished set of patchwork cards - tutorial
** Tutorial is for your personal use, and creative inspriation only. Please do not use my design to produce cards for sale**

Read Full Post »

Someone asked for a tutorial for how I finish my placemats.

This is basically the birthing method – so it’s definitely not original, or new, but it does make a nice placemat.

1) Make the fronts of your placemats – you can use a single solid fabric, or use patchwork or applique, whatever you like. It’s a great way to use up scraps or orphan blocks.I’ve used one of my favorite designs, a couple strips of patchwork on a white background.

The size is up to you – my sample here is on the small side at 11×14. Keep in mind that you’re going to lose a quarter inch seam allowance on each side.

Patchwork Placemat front

2) For each placemat, cut a backing and piece of batting the same size as your fronts.

Batting and Backing for Placemats

3) Assemble the quilt sandwich. But be careful, the order is a little different than most quilting. I’ve layered them out so you can see the order:

Front, right side up

Backing, wrong side up (so the right sides are together)

Batting.

You, of course, are going to layer them with the edges neatly lined up.

Pin carefully (I’m usually a lazy pinner, but you don’t want things to shift and twist here)

Order for assembling placemats

4) Stitch most of the way around, leaving a gap large enough for your hand to fit through easily. A walking foot helps – if you’re not using one, just be extra careful that things don’t shift.  Whatever foot you use, keep an even, quarter inch seam allowance.

You can use pins to mark your opening, like the picture, but I don’t usually bother. If I  have a choice, I do try to keep the opening away from patchwork seams, so I don’t put stress on them when I’m turning it.

stitching placemat

5) Trim the corners to reduce bulk. Cut the tip of each corner on a 45 degree angle leaving yourself about an 1/8th of an inch seam allowance to the corner.

Trim corners to reduce bulk

6) Turn your placemat. I don’t have a picture here, really, there’s no way to take a picture of this that doesn’t just look like a ball of fabric, and I’m sure you can figure it out. Poke the corners out – I like to use the blunt end of a bamboo skewer, but use whatever, just be careful.

7 ) Press  – paying careful attention to the seams. You want them to lie flat and for the backing and front to make a nice even like. I iron the opening too, I think it makes it easier to stitch it up.

Press turned placemat

8) Which brings me to: hand stitch the opening closed using a ladder stitch. If you don’t know the ladder stitch, here’s a video

9) Top stitch around the edge of your placemat. This helps keep the folded seam in place and gives you a nice edge.

Topstitch 1/4 inch from edge

10) Quilt using the technique of your choice – I used machine-quilted straight, random lines, but you could do free motion or handquilting just as easily.

Quilted placematQuilted detail

That’s it.  Enjoy your  new placemat! Or whatever else you like – I make alot of small projects (coasters, tablerunners etc.)  the same way

set of four quilted placemats - green and white

Read Full Post »